My History of Battling Image Noise and A Review of Topaz DeNoise 6.0
A Tale of Woe. And Noise.
Let me tell you a tale… A tale of embarrassment… A tale of woe… But, also a tale of improvement!
Way back when I got my first true DSLR I went out and shot everything under the sun. And in the shade. And in the dark. And like most people just starting out in the digital era, I didn’t understand the relationship between my camera’s ISO settings and the noise recorded by its digital sensor. (Heck, I hadn’t even learned to start shooting in RAW mode yet.) I have a video to release soon that will explain in detail what noise is, where it comes from and how it affects your images based on the light levels your camera is recording. But for now, I’ll just finish telling my story and afterward I’ll give you some hints on how to deal with noise in your own images, based on what I’ve learned.
One day, I found myself stuck in an airport in Hawaii (not really a horrible place to be stuck, mind you). To pass the time I found an indoor garden on the airport map and wandered over to see if there was anything there worth shooting. Generally, if it has “garden” in the name it almost always has something worth shooting. My favorite find in the garden that day was actually a small black and white lady bug. I put on my macro lens and cranked up the ISO to 3200 because I was in decent shade and that bug was moving fast and I needed a quick shutter speed to avoid blur. I finally captured the little guy in my sensor as it wandered across a plant, and I ended up loving the resulting image:
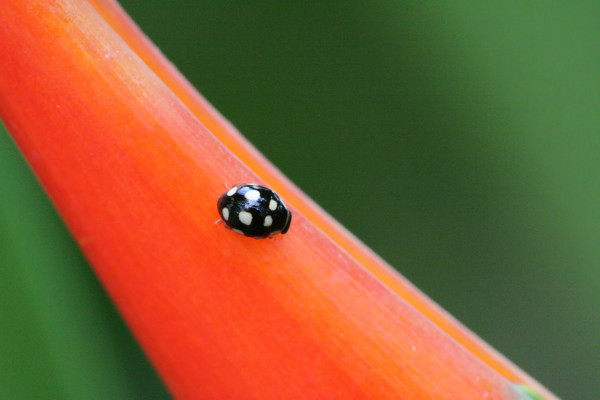
Yay! Loved it! I set it as my backdrop for a long time. I used it in my screen saver. I showed it to friends who nicely responded “Wow”. I loved the reflection on the bugs back. I loved the colors in the plant and the background. It was perfect in my eyes. At the time.
So I Had It Printed
And then… I had it printed as a 20×30 inch print. I was so excited to pull it out of the tube, as I was about to frame it and take it to an art show as a leading piece in my show. And I was so disappointed at what I saw exit the tube: Noise. Everywhere. There was simply no way in the world I could sell this print that I had just paid a pretty penny for. I knew there was some noise in the image I sent to the printer, as I had seen it on my monitor. But I didn’t think it would be that visible in print. Sadness.
Here’s a close-up of the noise:
Noise!!!
What should have been a beautiful, non-distracting green background was full of speckled bits of ugliness. From that day on, I declared a battle against noise. Never again would I print another image full of noise!
The Battle Begins
[Disclosure: Most of the links below lead to the Topaz Labs store, where you can purchase software from Topaz Labs. They have not compensated me in any way for reviewing their software or other products. Many of the links below will provide me a referral compensation (at no cost to you) if you choose to follow them and make a purchase. Feel absolutely free to ignore the links and go to their store directly if you’d rather. Of course, if you appreciate the work I put into this article, feel free to use the links to help you build your software tool set while providing me some small gains as well.]
I’ve tried a ton of noise processing utilities since that day of disappointment. There are a number of good filters built into Adobe’s Adobe Creative Cloud suite, of course. But, you do need to learn how to tune the parameters and in the end it can’t handle the more extreme conditions and you’ll lose a fair amount of detail in the process as well. I used “noise ninja” for a number of years, which was fairly good. I even dabbled with some open source, freely-available software and plugins that were actually quite good. But in the end, I’ve now become a heavy user of Topaz Labs’ Denoise Program and Plugin. Why? Because in the end I have the most control over the balance between sharpness, clarity and noise reduction. And you know it has to be a good tool because it takes so long to think about your pictures when you finally push the “Process” button. Clearly it must be very smart inside to think for so long. Ha ha.
Recently (yesterday as of the time I’m writing this), Topaz Labs released version 6.0 that contains, among it’s list of features, one feature that made me hit the download button immediately: support for presets based on camera model and ISO settings. That’s a simply brilliant idea. But, as I warn my photography students all the time: don’t ever use presets exclusively. Consider them a good starting point, but not a final solution. I’ll certainly follow my own advice with the presets in deNoise 6, especially when I use an offset exposure to perform high-key and low-key photography, where I doubt the presets will work perfectly. But wow, a good “first starting place” based on my camera settings could be such a time saver.
So, How Did It Work???
Well… the image of the lady bug was the first image I thought of trying with it, being the one that had the biggest impact on my desire to battle noise over the years. So I loaded it into DeNoise 6 and…. sadly my wonderful ladybug image had been taken on my older camera, a Canon EOS 50D, and there was no default setting for it.
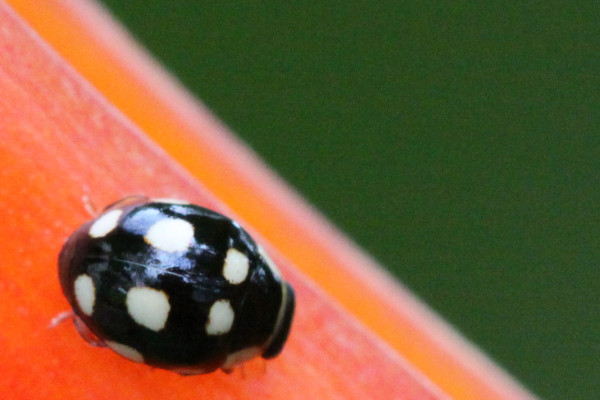
Oh well… at least I had watched the Topaz Labs Tutorials and knew how to use DeNoise properly anyway. I think the processing came out quite good in the end, tweaking it by hand. But what do you think? Here’s the resulting images for your study:
 Original
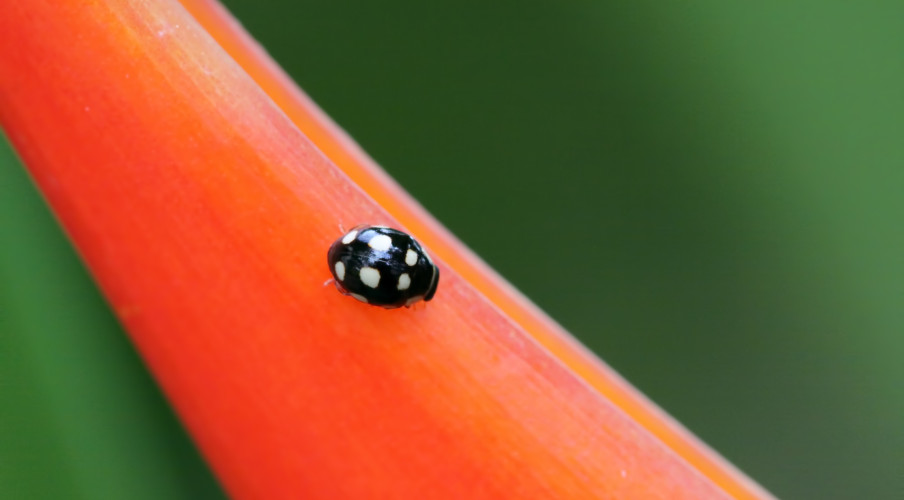 Processed for noise
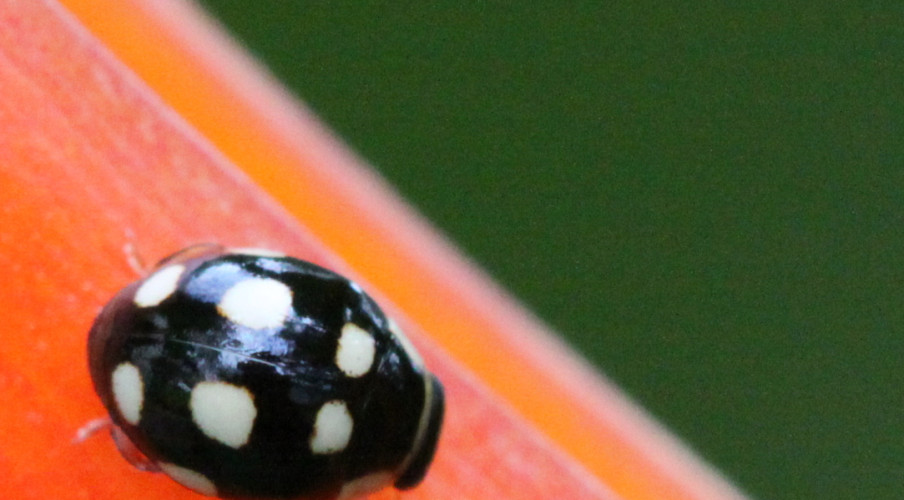 Original
 Processed for noise
So, How Did It Work The Second Time?
After finishing the lady bug I went diving into recent pictures for a dark image (hint: which causes noise problems) with a moderately high ISO (hint: which causes noise problems). I selected my camera model (a Canon 5D3) and my ISO setting (400! See how I’ve learned not to push it!) from the DeNoise presets and compared the two.
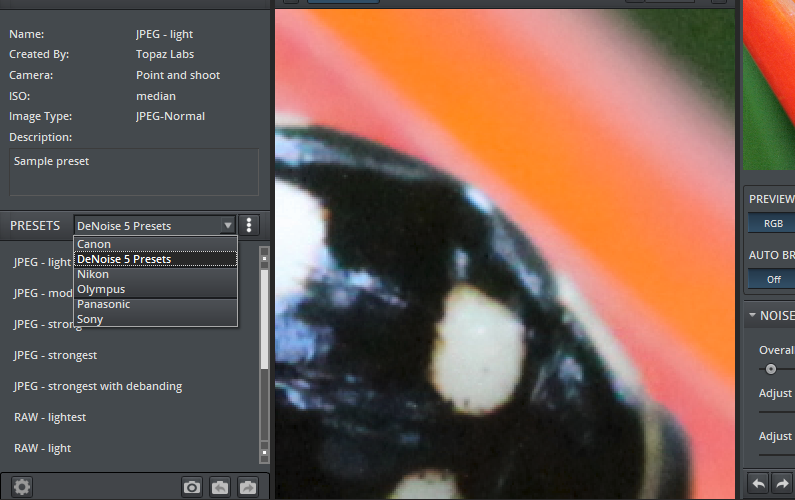 DeNoise Preset Menu
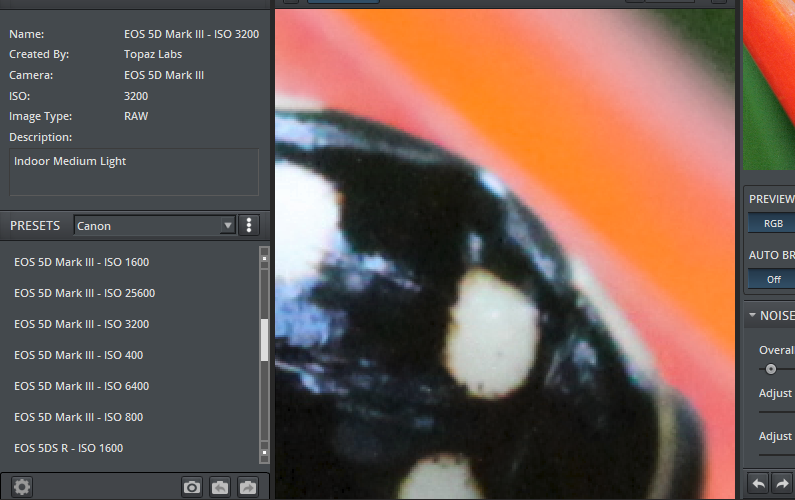 Selecting My Camera and ISO Setting
Overall, the resulting preset wasn’t a bad starting place. But I did refine the sliders a bit further. In fact, I pushed them quite a bit further in the images below so you can see what happens when you ask DeNoise to really fight a battle for you. Here’s three more images to study and evaluate their noise levels.
 Original Unprocessed
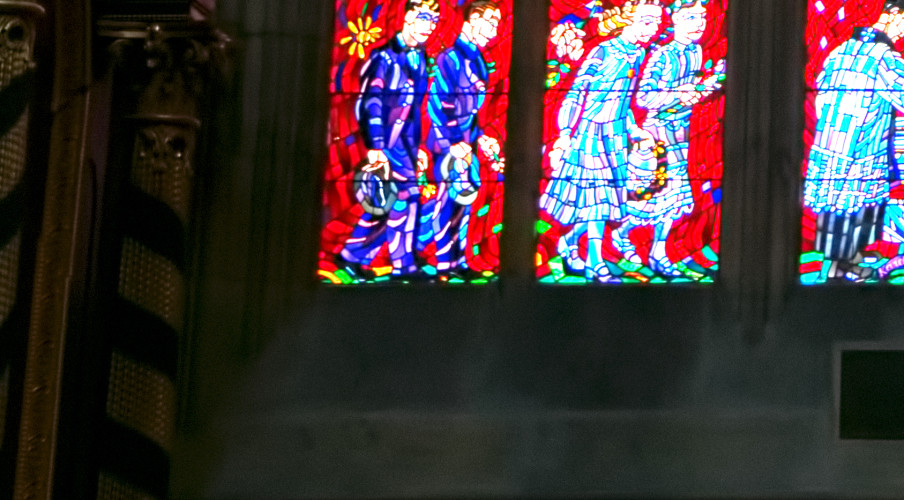 Default Preset For Camera
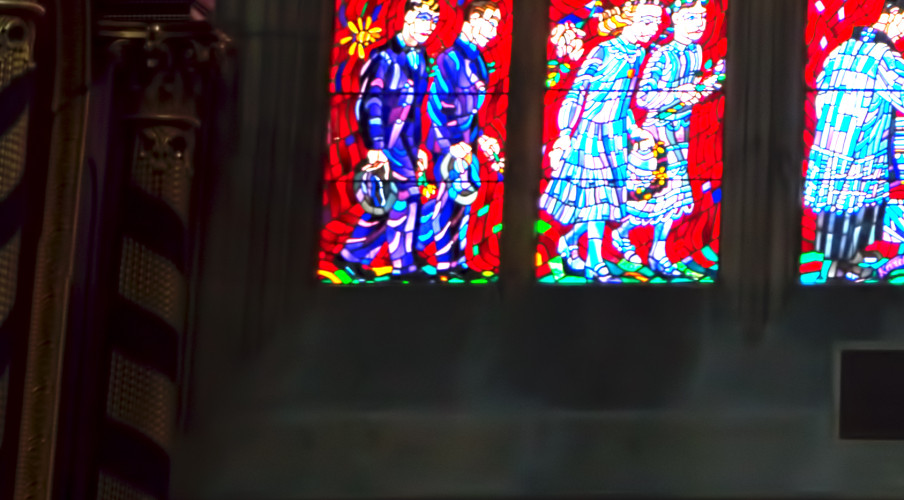 Processing Pushed Further
Note: I did brighten the images a bit so you could see the dark areas better in order to truly evaluate them for noise
Conclusion
I love the fact that I have a better place to start from in deNoise 6. But, my guess was right that you should “never trust preset settings” and you should only use them as a starting point. Afterward, continue tinkering with the adjustments until it meets your personal level of perfection.
In the end, it’s still the best utility I’ve ever found that handles my expectations for processing noise. And as you heard above, I got hit hard enough by it in my past that I expect a lot from any utility that claims to help me out.
If you have another tool that you prefer, I’d certainly love to hear about it. If you don’t have a copy of DeNoise yet and have been looking for something that works, feel free to hop on over to their site and try it out for free for 30 days. Make sure you watch their tutorials on how to use it, though. Learning how your tools work is a critical step in improving your post processing.